User Manual
-
Student
-
Teacher
-
Auto-marking
-
Coding
-
-
- Generate a Option List
- Deselecting All Options
- Choosing All Options
- Deselect Some Options
- Select Some Options
- Getting Options that are Selected
- Changing the Option List Size
- Drop Down List With Multiple Selections
- Checking Option List is Multiple or Not
- Setting Multiple Choices in Option List
- Getting All Options
-
-
- Changing Margins
- Creating Space Around the Variable in Different Side
- Border Radius Width
- Changing Minimum Height
- Changing the Height of Variable or Layout
- Changing Maximum Width
- Changing Minimum Width
- Changing the Width of Variable or Layout
- Self Alignment Property
- Fitting the Space Available in Flex Container
- Flex Shorthand Property
- Changing Maximum Height
-
-
-
-
-
-
-
- Adding Two Values
- Subtracting two numbers
- Multiplying two numbers
- Dividing two numbers
- Setting a Number
- Showing Remainder Between Two Numbers
- Finding the Minimum Values
- Finding the Maximum Values
- Changing the Number to Absolute Value
- Taking the Square Root
- Converting the Number to an Approximate Value
- Choosing the Random Value
-
-
-
- Breaking Text with Separators
- Checking Whether the Text Contains Characters
- Finding the Position of the Character
- Checking Text is Empty or Not
- Showing Text in Substring Format
- Showing the Order of Characters in Two Texts
- Displaying Character at the Certain Position
- Using Character Code to Show Text
-
-
- Converting Text to DateTimeOffset Format
- Generate a DateTimeOffset with Different Unit
- Generate DateTimeOffset Using Unix Time
- Using the Current Time to Display DateTimeOffset
- Combining a New Offset with DateTimeOffset
- Modifying Offset
- Changing the Format of DateTimeOffset to Text Format
- Converting DateTimeOffset to Text Format
- Adding DateTimeOffset with Duration
- Calculating the Duration Between Two DateTimeOffsets
- Checking Whether DateTimeOffsets are the Same
- Showing DateTimeOffset in Milliseconds
- Showing DateTimeOffset in Different Time Format
- Checking Whether DateTimeOffset is in Correct Type
-
- Converting Text to Duration
- Transforming Number to Duration
- Converting String to Duration
- Making Opposite Duration
- Adding Two Durations
- Changing the Duration Unit
- Checking Whether Two Durations are the Same
- Displaying Total Number of Duration in Different Units
- Showing Duration in Number Format with Unit
- Checking Whether Duration is in Correct Data Type
-
-
Coding - Pi
-
-
-
-
- Adding Two Values
- Subtracting two numbers
- Multiplying two numbers
- Dividing two numbers
- Setting a Number
- Showing Remainder Between Two Numbers
- Finding the Minimum Values
- Finding the Maximum Values
- Taking the Square Root
- Converting the Number to an Approximate Value
- Changing the Number to Absolute Value
- Choosing the Random Value
-
-
- Transforming Text to Number
- Concatenating the Text
- Checking the Length of Text
- Setting Text
- Breaking Text with Separators
- Checking Whether the Text Contains Characters
- Finding the Position of the Character
- Checking Text is Empty or Not
- Showing Text in Substring Format
- Showing the Order of Characters in Two Texts
- Displaying Character at the Certain Position
- Using Character Code to Show Text
-
-
-
- Converting Text to DateTimeOffset Format
- Generate a DateTimeOffset with Different Unit
- Generate DateTimeOffset Using Unix Time
- Using the Current Time to Display DateTimeOffset
- Combining a New Offset with DateTimeOffset
- Modifying Offset
- Changing the Format of DateTimeOffset to Text Format
- Converting DateTimeOffset to Text Format
- Calculating the Duration Between Two DateTimeOffsets
- Adding DateTimeOffset with Duration
- Checking Whether DateTimeOffsets are the Same
- Showing DateTimeOffset in Milliseconds
- Showing DateTimeOffset in Different Time Format
- Checking Whether DateTimeOffset is in Correct Type
-
- Converting Text to Duration
- Transforming Number to Duration
- Converting String to Duration
- Making Opposite Duration
- Adding Two Durations
- Changing the Duration Unit
- Checking Whether Two Durations are the Same
- Displaying Total Number of Duration in Different Units
- Showing Duration in Number Format with Unit
- Checking Whether Duration is in Correct Data Type
-
-
-
- Loading Custom Pose Model from URL
- Classifying Pose on Image
- Classifying Pose on Image and Get All Result
- Showing the Class Labels in Pose Model
- Showing the Total Amount of Classes with Pose Model
- Draw All Skeleton and the Key Points
- Draw All Skeleton Inside a Photo
- Draw All Key Points Inside a Photo
Print
UnaGPT Tasting Lesson – First Time User Guide
「UnaGPT」AI Auto-marking Free Trial
The following instructions are suitable for users who have applied for a free trial of UnaGPT. Teachers are welcome to apply or contact us for details.
Before 1 Mar
Step 1: Change Interface Language (Optional)
- Go Una’s Login Page: https://app.una.study/
- Log in to the platform using a student account (Detailed instructions: user-manual/student/student-getting-started/student-login)
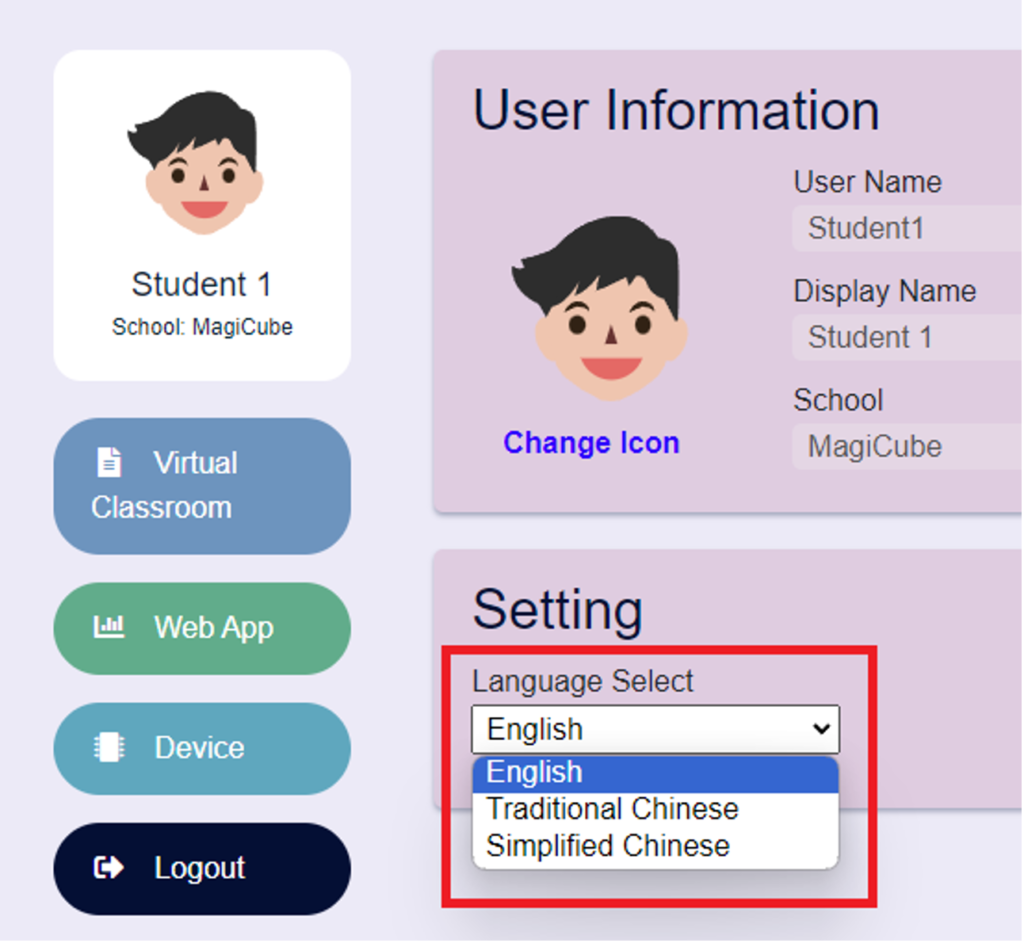
- Click on the avatar to enter the user profile page
- Choose another language
Step 2: Read Task Instruction
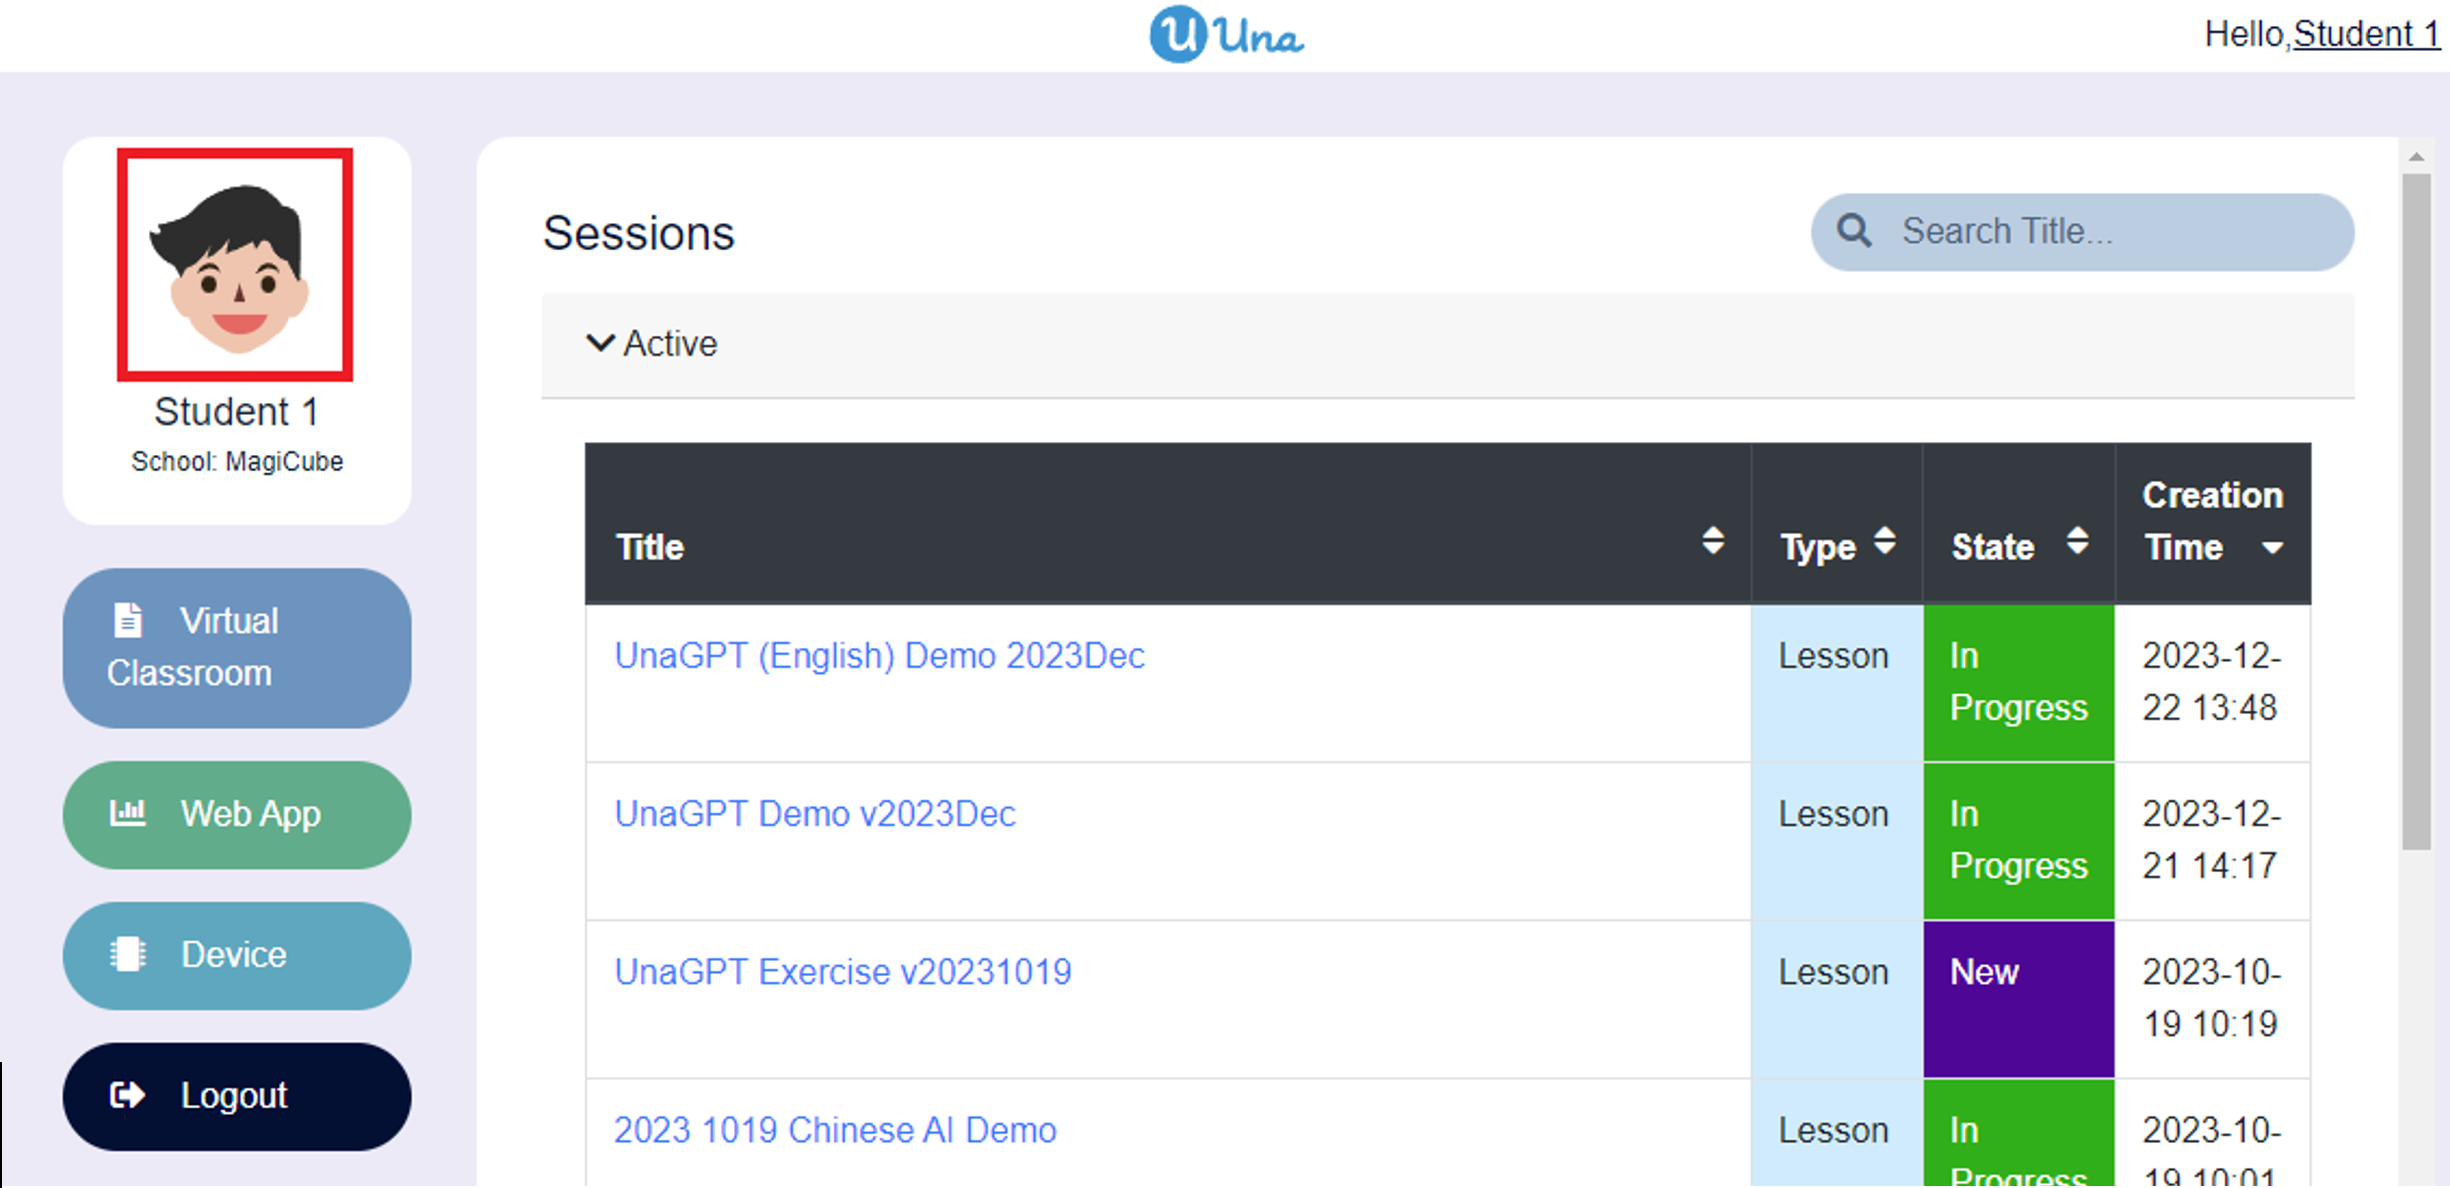
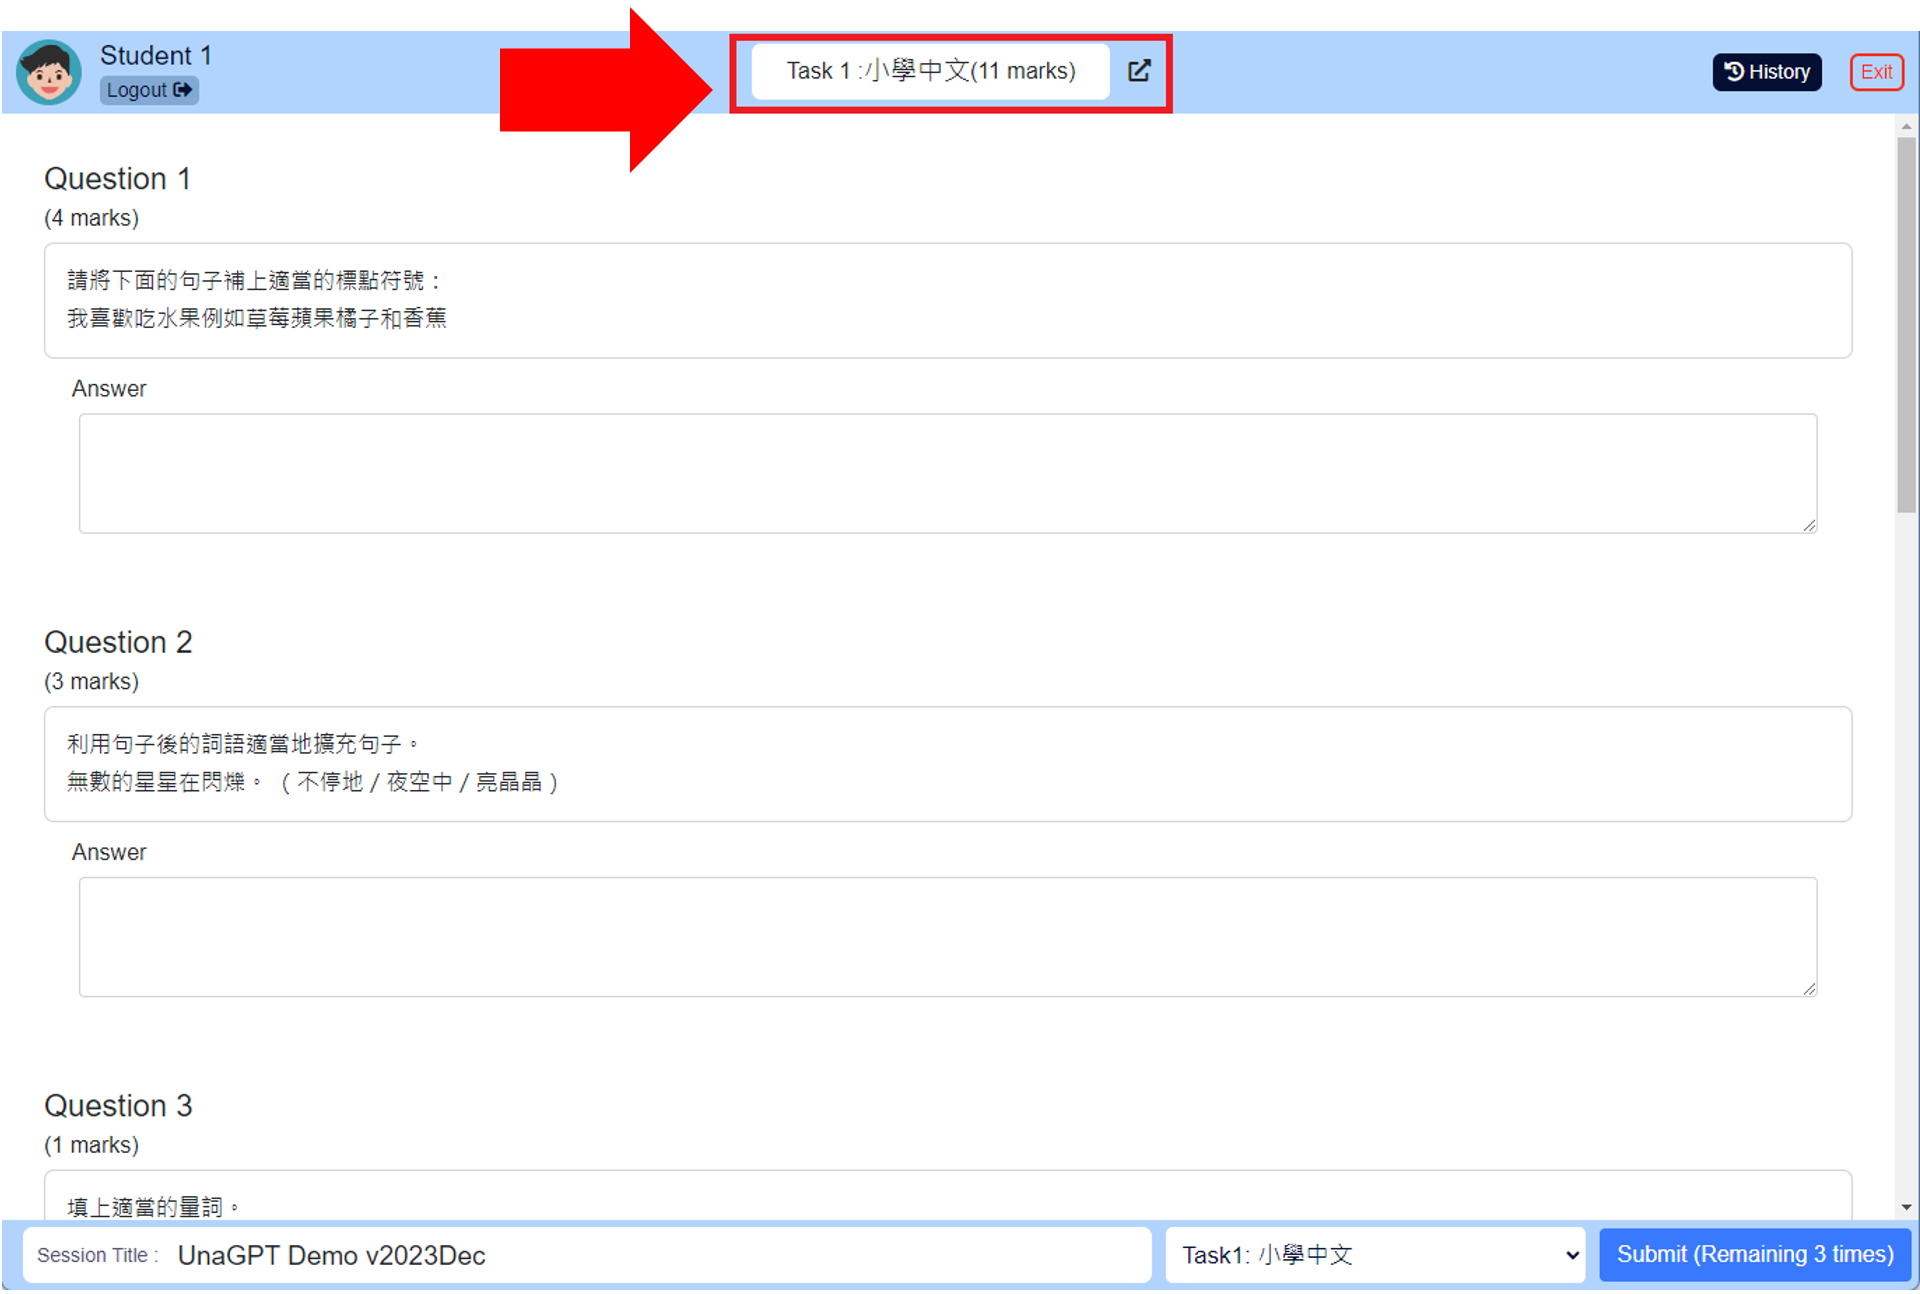
- Enter the session (virtual classroom) – “UnaGPT Experience Lesson”。
- Once you entered a session (virtual classroom), task instruction will be prompted on the right.
- If you are not able to see the instructions, click the task details box as shown.
Step 3: Answer and submit a task
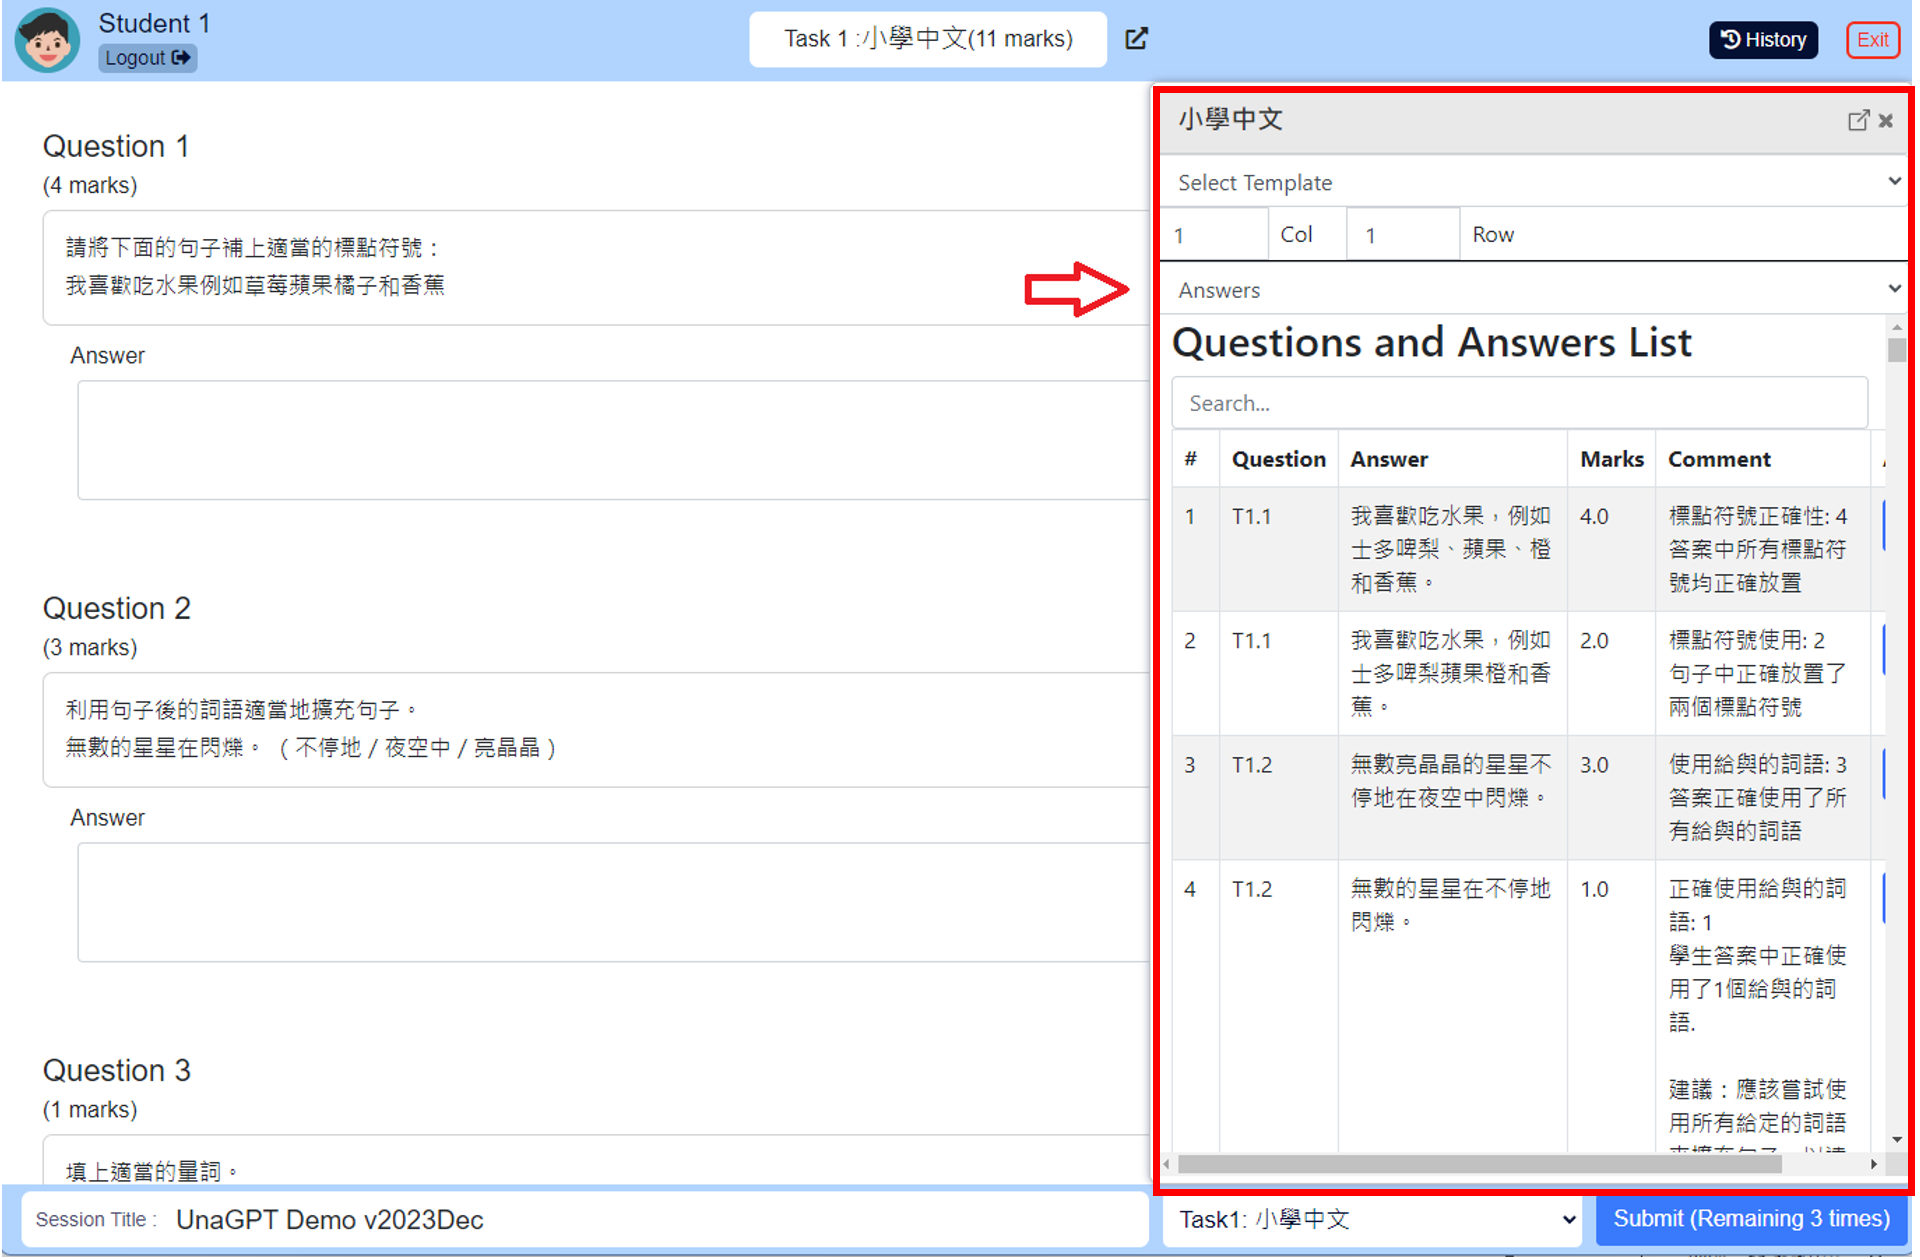
- Click the task menu below to select the subject you are interested in.
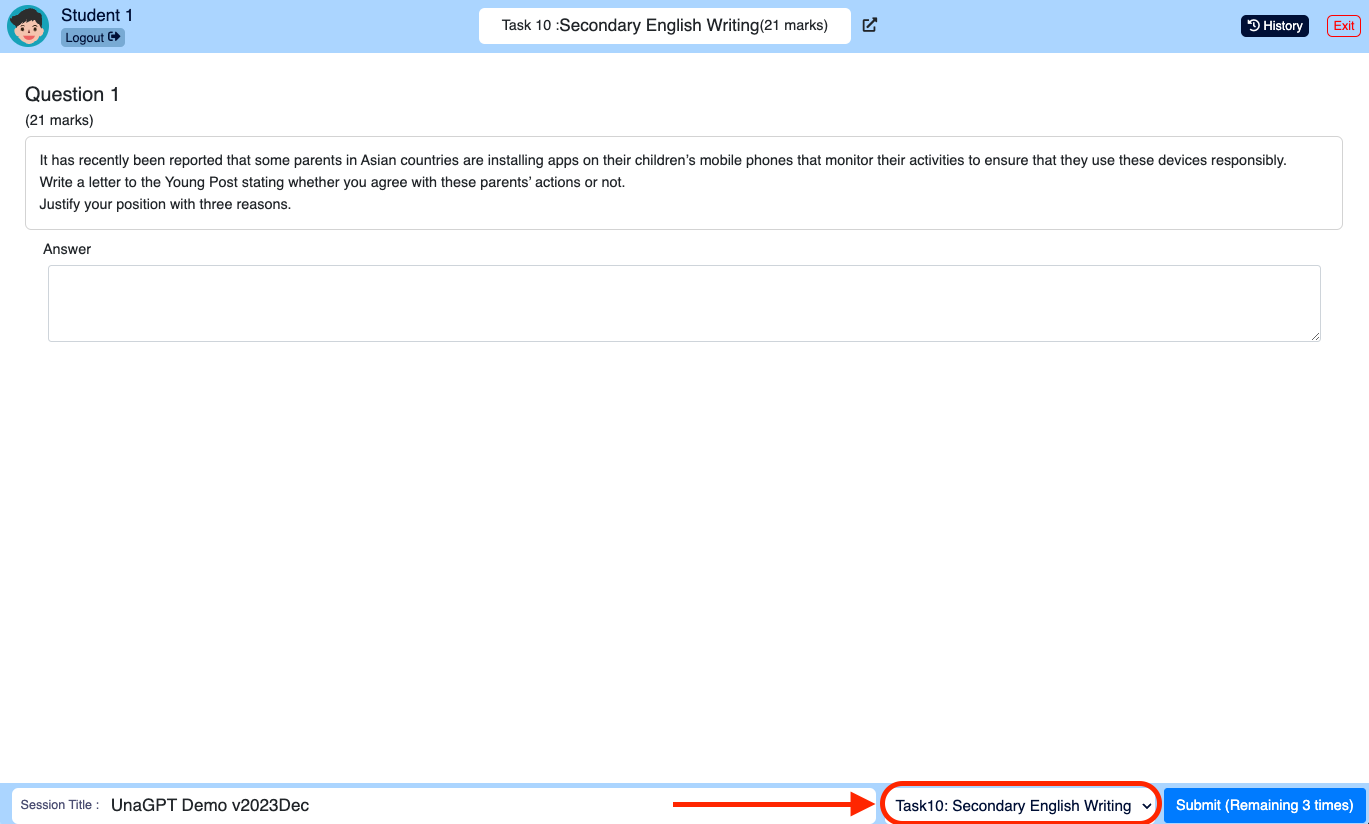
- Type answer in answer box.

- You can find the test answers we provide in the task instruction. If you need to copy the answer, you can click “Copy” and paste it into the answer box.

- In addition, if you want to quickly find test answers, you can enter “T{task number}.{question number}” in the search box. For example, “T2.1” means searching for the first question of the second task.

- After completing all questions in the same task, click “Submit”.

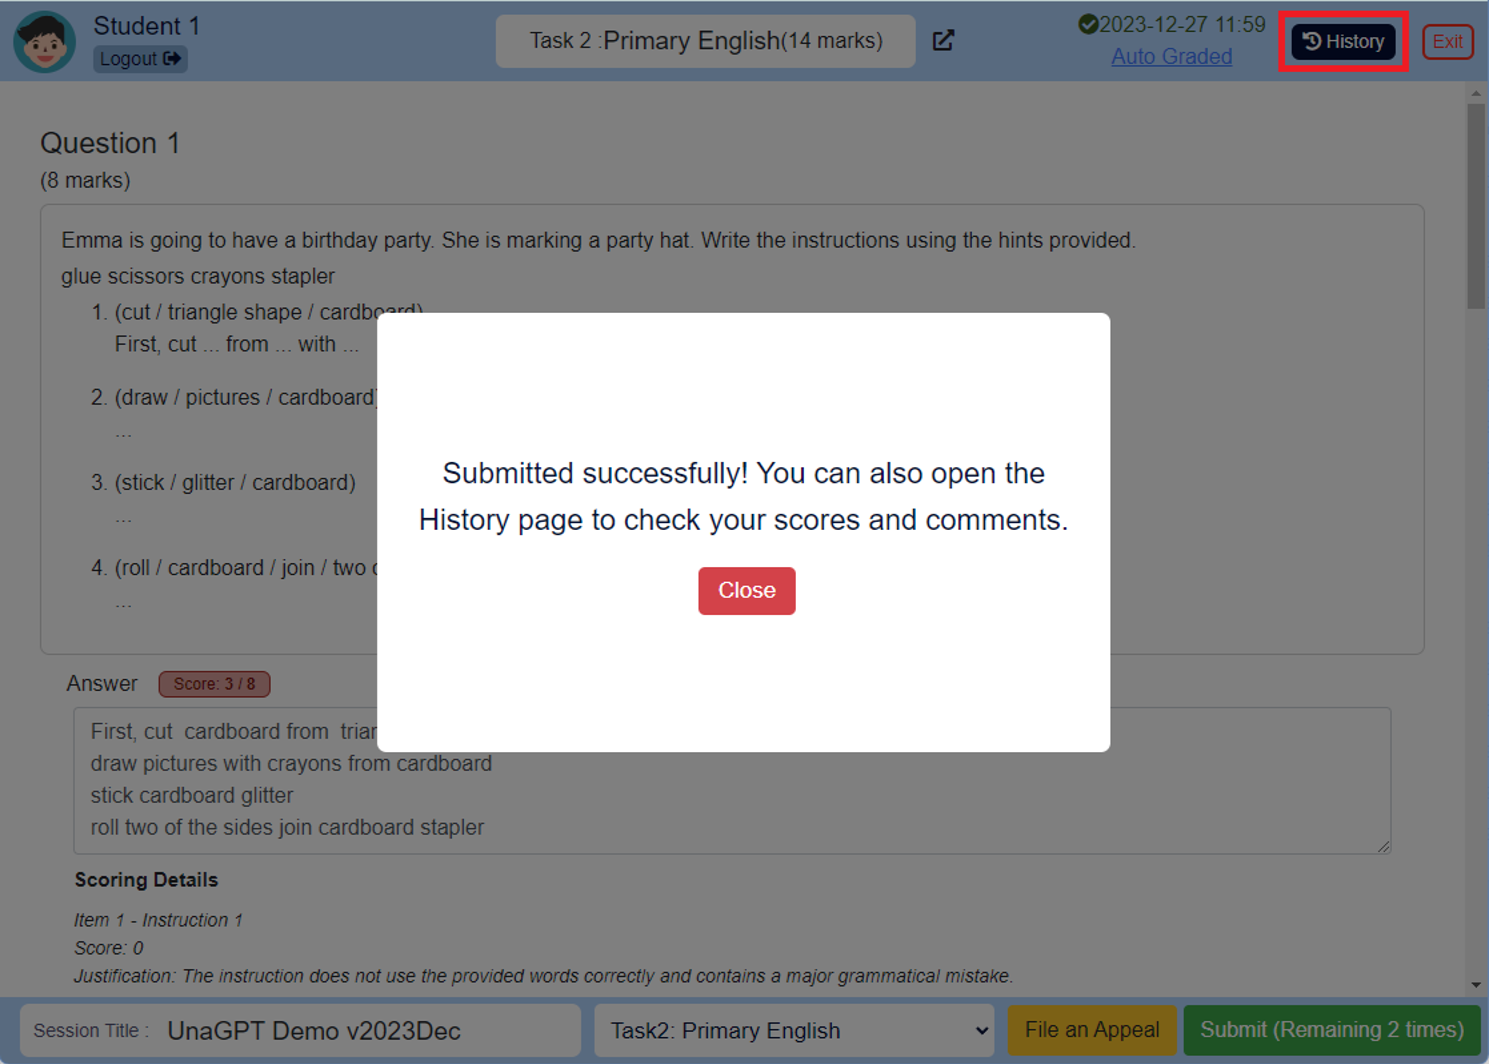
- Choose “Confirm” after a dialog pops up. Wait for the AI evaluation patiently, do not close or refresh this tab.

Step 4: Check AI Generated Grade and Feedback
- AI grading and feedback will be released according to mode setting.
- Immediate Mode: student can check the grade and feedback right after submission or find in History. Remarks: This mode is selected for all tasks in this example.
- Review Mode: student can only check the grade and feedback after teacher reviewed the score and comment.
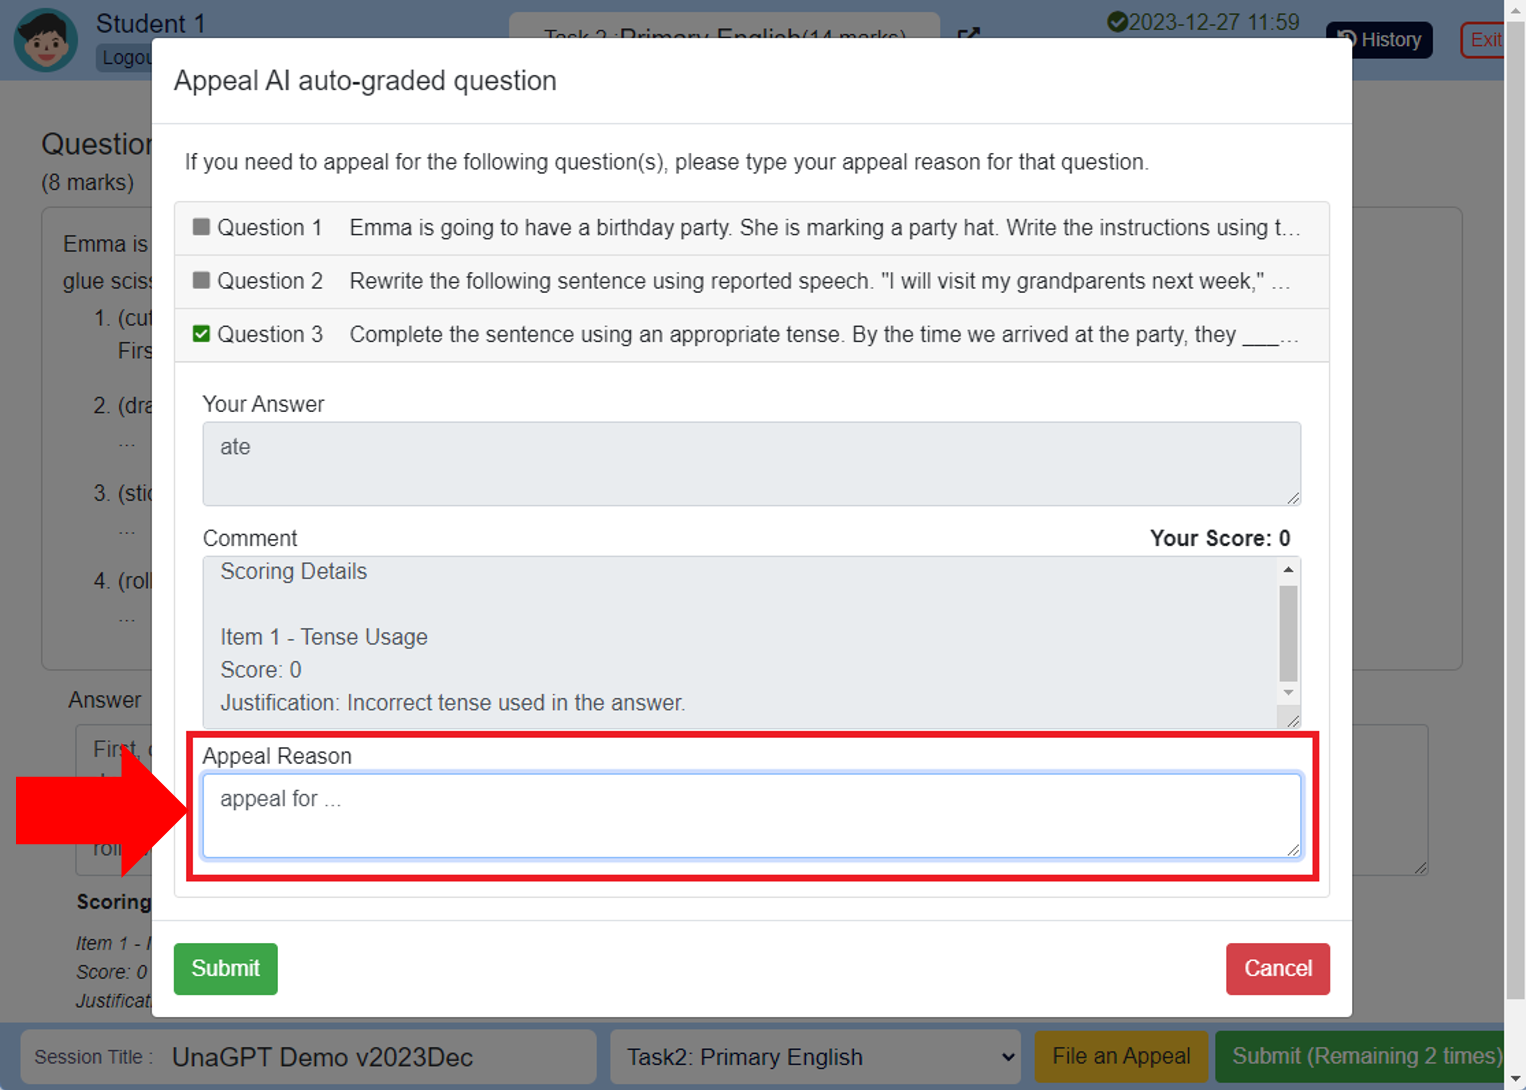
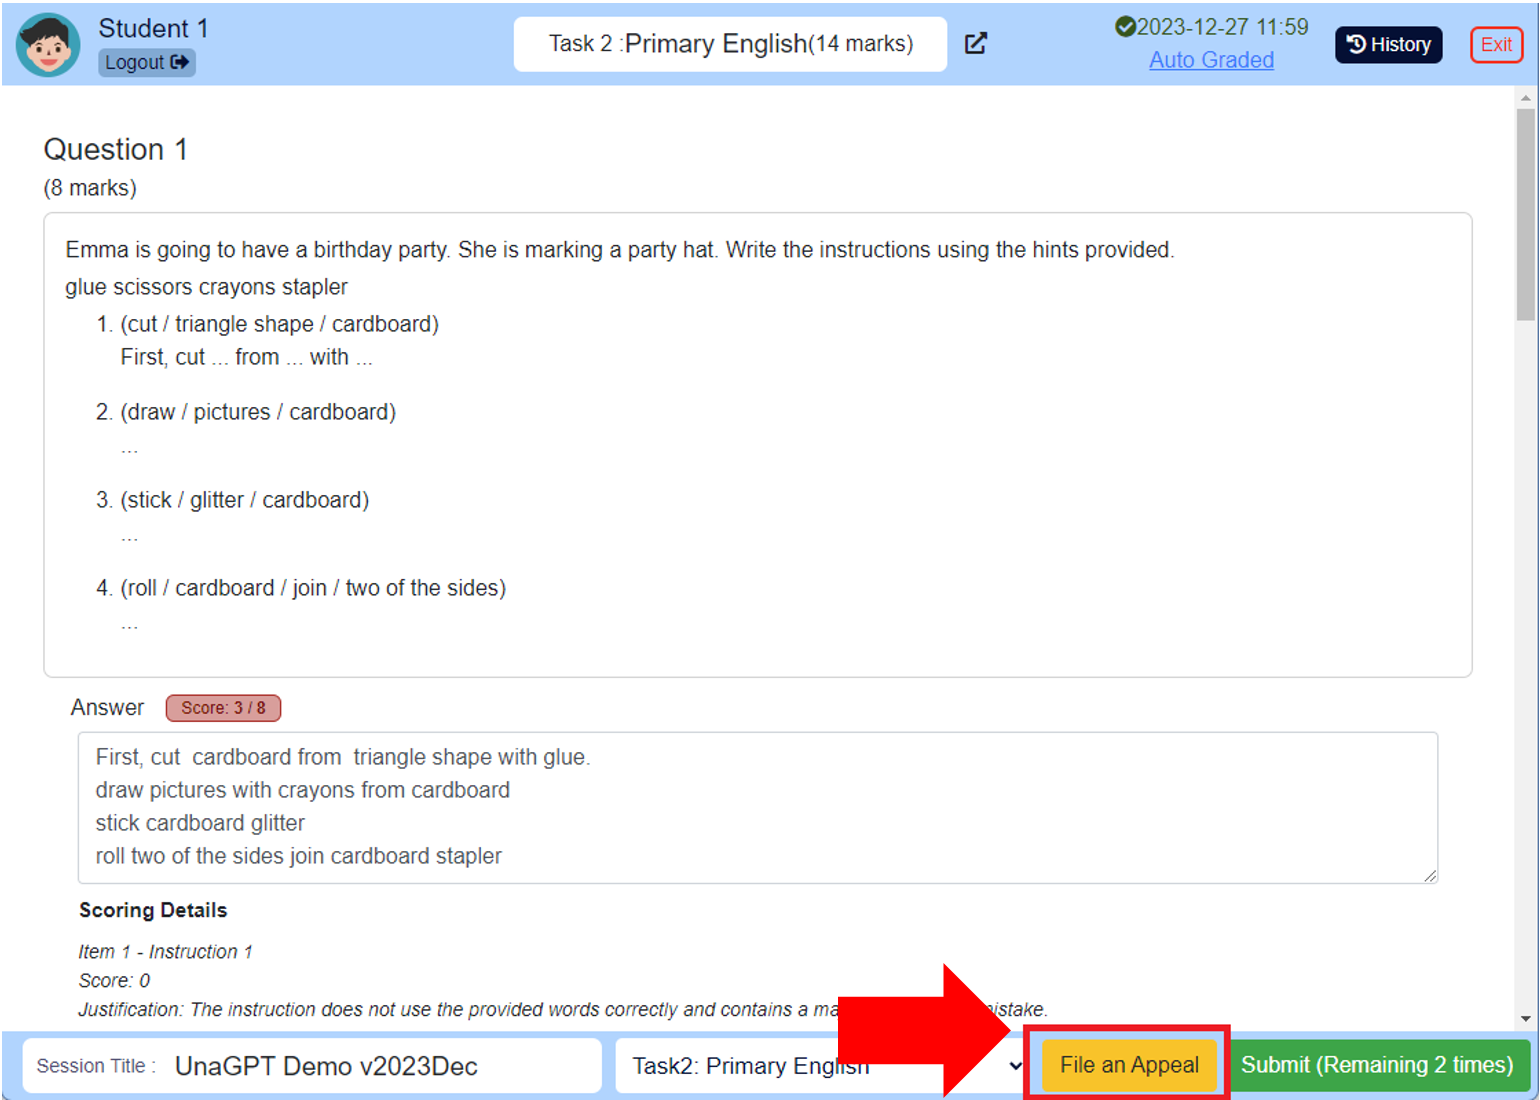
Step 5: File an Appeal (Applicable for Immediate Mode Only)
- Student can file an appeal concerning AI feedback.
- Click “File an Appeal” button
- Select questions to be appealed and fill in the reason. Remarks: student cannot file an appeal on question with full mark obtained.
- Click “Submit” after filling in Appeal Reason for all questions require an appeal.
- After teacher reviewed the appeal, student will receive a notification on the main page, and email notification. Remarks: This is only applicable to students who uses an email address to login to the platform.